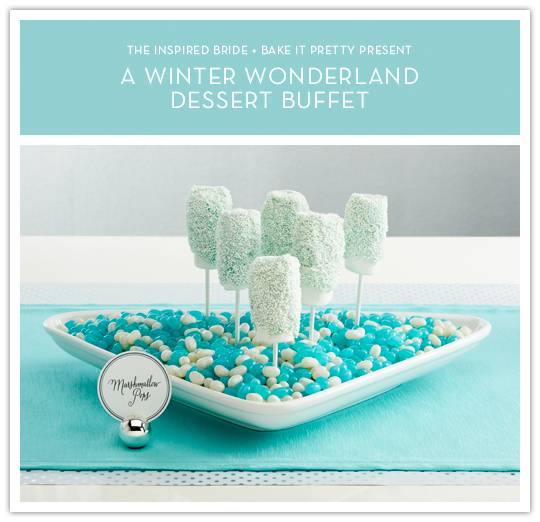
Choosing desserts can be a pain. That is why these marshmallow pops are a godsend! They are an incredibly simple way to surprise and delight your guests. We are no Caketresses but these don’t even take a terribly long time to make, and there’s not a lot of skill involved. Whether you are having a dessert-only reception or even just a wedding rehearsal dinner, these are great additions to any wedding spreads.
We partnered with our friends in Bake It Pretty for this dessert DIY. We made these covered in Bake It Pretty’s Non-Pareils but did a test run in their white pearlized sprinkles and they were absolutely stunning!
• • ♥ • •
What You’ll Need for Marshmallow Pops
Jumbo Marshmallows (Preferably Two Bags)
Bake It Pretty’s White Chocolate Candy Melts
Bake It Pretty’s Light Blue Candy Melts
Bake It Pretty’s Non-Pareils in White
Long Lollipop Sticks
Makeshift or Actual Double Boiler
Parchment Paper
Line a cookie sheet with parchment paper and set aside. As you create the pops, place them here in preparation for dipping. Open your marshmallow bags and select the pieces that are dry (in other words, their confectioner’s sugar coating hasn’t been removed and they haven’t stuck to other marshmallows yet). These pieces are the preferred ones to use. Match marshmallows up by their shape (none will be perfectly circular) and stack them two high, each marshmallow in a vertical orientation. Put a lollipop stick through each couple of marshmallows; the stick should go far through both marshmallows, but just short of going clear through the top marshmallow. When all of the two-high stacks have been put on sticks, set the cookie sheet aside. Melt a candy wafer mixture of the two colors (approximately 25% blue, 75% white to get the shade we used) over low heat in a makeshift or actual double boiler. While waiting for them to melt, set aside a plate and carefully pour the sprinkles onto it. When the candy wafers have melted, take a marshmallow stick and completely submerge the marshmallows. Pull the stick out, let some of the excess drip off, and quickly transfer the pop to the sprinkle plate. Roll the marshmallow pop through the sprinkles so that they set into the candy coating while it cools. When the sprinkles have thoroughly covered the pop, place it back onto the parchment paper to cool. Repeat on all of the other pops, and place them in the fridge to speed cooling to finish them.
Would you be making these yummy marshmallow pops for your reception to wow your guests? Or will you ask somebody to potluck it for you?
Let us know in the comment section below!
Images by Michael Haug; prop styling by Kirki Schultz; food styling by Maddy Hague.
How did you stand them up so they didn’t topple over? Thanks for the awesome details and ideas!
Hey Tiffany – I think I mentioned it in one of the posts but we used a thin piece of styrofoam wrapped in parchment paper. You put the sticks in firmly – don’t adjust it too much or the holes will become too big to support the stick. Place the jelly bean layer over the styrofoam – the parchment paper will contain any foam that crumbles off in case somebody snacks on the jelly beans (although I’d still advise people to stay away from them if possible). Hope this helps!
Hello! I see you have the template with the pretty callig for the thank you labels, but do you have the template to label the candy with this same font?
How long do these marshmallow pops last (e.g. how much in advance can they be made?)