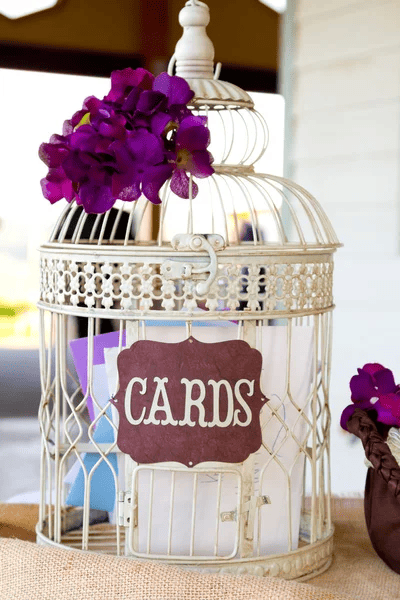
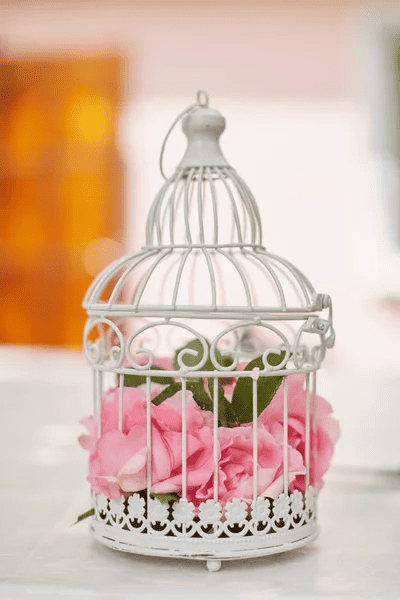
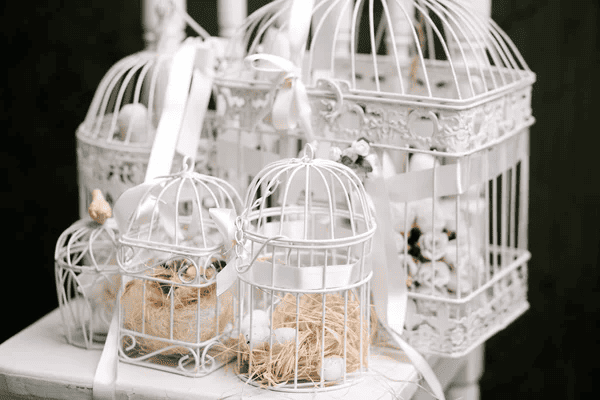
A wedding card box is a great way to collect gift cards and well wishes from guests, which can make your wedding day special.
Making your own wedding card box that matches your theme is a fun DIY project that adds a personal touch to your special day. One creative and charming way to do this is by transforming a vintage birdcage into a unique wedding card box.
This DIY project allows you to repurpose a beautiful vintage piece and adds a touch of elegance and nostalgia to your wedding theme.
In this article, we will guide you through the step-by-step process of transforming a vintage birdcage into a stunning wedding card box for your upcoming wedding. From gathering the materials to setting it up on your big day, we have you covered.

Key Takeaway
- Transforming a vintage birdcage into a wedding card box adds nostalgic elegance and personal DIY touch to your wedding theme, say a concert themed..
- The project involves gathering materials like spray paint, fabric, ribbons, and decorations, preparing, decorating, and strategically placing the birdcage.
- Key steps include cleaning, spray painting, and decorating the birdcage with faux flowers and ribbons to match the wedding aesthetic before securing cards inside.
- Finally, the customized birdcage card box should be conveniently positioned near the gift table so guests can easily contribute cards and well wishes.
Step-by-step Guide to Transforming a Vintage Birdcage into a Wedding Card Box
Step 1: Gather Materials
Before you embark on your DIY journey, it’s important to gather all the necessary materials.
Here’s a list of what you’ll need:
- Vintage birdcage: Look for a birdcage with a sturdy structure and a design that fits your wedding theme, like a beautiful Victorian wedding.. The vintage appeal adds a touch of elegance to your cardboard box.
- Spray paint: Choose a spray paint color that complements your wedding color scheme. This will help tie everything together and create a cohesive look.
- Hot glue gun: A hot glue gun will be handy for attaching embellishments and securing the fabric inside the birdcage.
- Fabric and ribbons: fabric and ribbons that match your spring wedding theme or other themes.. For example, turquoise ribbons would be a perfect choice if you’re going for a beach wedding.
- Faux flowers or peacock feathers: These decorative elements can add a whimsical and romantic touch to your beautiful wedding card box. Choose fresh flowers or feathers that align with your overall wedding style.
- Strategically placed magnets or binder clips: To ensure the cards stay in place, consider adding magnets or binder clips to hold the card box closed.
- Real wood: It is a good idea to use real wood to enhance your DIY creation’s authenticity and durability.
Step 2: Prepare the Birdcage
Now that you have gathered all the materials, the next step is to prepare the vintage birdcage for its transformation.
Here is how to do it:
- Clean the birdcage: Start by thoroughly cleaning the birdcage to remove any dirt or dust. This will ensure a polished final result.
- Attach fabric inside the bottom: Use spray adhesive to attach enough fabric inside the box of the birdcage. This will create a soft and elegant backdrop for the wedding cards.
- Spray paint the birdcage: Spray paints the birdcage in your chosen color to match your wedding colors. Make sure to apply several thin coats for a smooth and even finish. Take your time during this step to achieve a flawless look. Remember, attention to detail is key!
Cleaning the birdcage is crucial for achieving a professional and polished look. Be sure to select a spray adhesive suitable for attaching fabric inside the box.
Here are some great tips for selecting the right type of spray :
- Select a spray adhesive compatible with your fabric type.
- Decide between temporary or permanent bonding options.
- Consider using multiple coats for an even finish.
- Opt for a versatile adhesive that is effective on various surfaces.
- Choose a low-residue formula to prevent marks on light fabrics.
- Prioritize non-yellowing adhesives to maintain color integrity.
- Pick a fast-drying spray adhesive for efficiency.
- Choose easy-to-clean formulas in case of overspray.
- Consider low-odor or odorless adhesives for indoor use.
Step 3: Decorate Your Wedding Card Box

Now that your birdcage is clean and painted, it’s time to add the decorative elements to make it truly unique and personalized. Here are some ideas:
- Glue faux flowers or feathers: Add a touch of nature’s beauty to the birdcage by gluing faux flowers or peacock feathers. Get creative with the arrangement and experiment with combinations to find the perfect look for your wedding theme. If you’re looking for wedding theme inspiration, consider old hollywood.
- Tie ribbons around the birdcage: Use ribbons further to enhance the aesthetic appeal of your card box. Choose ribbons that complement your wedding theme and tie them around the handles or corners of the birdcage. This is great for a garden wedding. The ribbons will add a touch of elegance and create a visually appealing focal point.
- Add magnets or binder clips: To ensure the cards stay securely, consider adding strategically placed magnets or binder clips. This will prevent accidental spills and keep everything organized throughout the wedding day. It’s a small detail that can make a big difference.
Tips for Choosing Ribbons That Complement the Overall Theme:
- Color Coordination: Select ribbons in colors that harmonize with your overall wedding theme, ensuring they complement the chosen color scheme and add to the visual cohesion of your card box.
- Texture and Material: Consider the texture and material of the ribbons to align with the theme; for example, choose satin for a classic, elegant theme, or burlap for a rustic or vintage feel.
- Pattern Matching: If your wedding has a specific pattern or motif, opt for ribbons that match or complement these elements, adding a cohesive and coordinated look to the card box.
- Width and Length: Ensure the ribbons are of an appropriate width and length for easy handling and tying. This contributes to a neat and polished appearance, allowing creative tying styles.
- Contrast for Emphasis: Consider using ribbons that provide a subtle contrast to the birdcage’s color or the surrounding decor, adding visual interest and emphasis to the card box.
- Theme-Specific Accents: If your wedding follows a specific theme (e.g., beach, vintage, travel), choose ribbons with themed accents or details to enhance the overall coherence of the decorative elements.
- Personalized Details: Incorporate personalized touches, such as monogrammed ribbons or ribbons featuring the wedding date, to add sentimental value and make the card box uniquely yours. Use a craft knife and matte boards to create personalized details.
- Experiment with Layers: Explore the option of layering ribbons of different widths, colors, or textures. Use spray adhesive to secure layers and create a beautiful card box with depth and dimension.
Step 4: Set Up Your Wedding Card Box
Now that your vintage birdcage has been transformed into a stunning wedding card box, it’s time to set it up at your venue.
Enhance the charm of your wedding card box with creative elements such as a cardboard box, a larger box, picture frames, and a thoughtfully chosen color scheme.
Here’s how:
- Place it near the gift table: Position your card box near the gift table so guests can easily find it and drop off their cards and gift cards. This ensures a convenient location for guests to extend their best wishes.
- Ensure clear space for cards: Make sure there is ample space inside the birdcage for cards and gift cards to be placed. Consider adding a card slot or opening to make it easier for guests to insert their well-wishes. Utilize an old globe or top box to create a unique card-opening feature.
- Check venue regulations: Before setting up your card box, double-check the venue regulations regarding card boxes. Some venues may have specific guidelines or restrictions.
- Test the setup: Before the big day, it’s important to test the setup and make any necessary adjustments. This will allow you to address any issues or make adjustments if needed. Ensure that the card box is sturdy and secure to avoid any accidents or mishaps during the wedding.
Conclusion

Transforming a vintage birdcage into a unique wedding card box is a great DIY project and a meaningful way to add a personal touch to your special day.
Your guests will appreciate the creativity and theme of a repurposed birdcage, and it will provide a beautiful photo opportunity that captures the essence of your wedding.
Best of all, DIY wedding card boxes are inexpensive yet meaningful wedding crafts that add a charming touch to your celebration.
Hope these DIY wedding card box ideas will help you craft your wedding cardholder.
So, gather your materials, follow the step-by-step guide, and enjoy crafting your wedding card box!