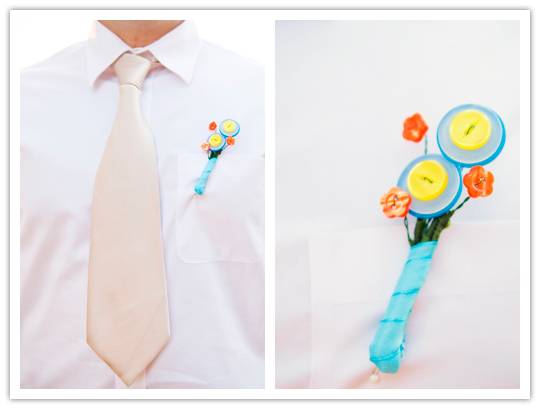
Karen from Silverberry Occasions was kind enough to give us some of the lovely DIY projects she created for the Vintage Sewing shoot featured yesterday. First up is an absolutely adorable (and super colorful!) button boutonniere that will add a little quirk to any wedding!
• • ♥ • •
What You’ll Need:
Buttons
Floral Wire
Floral Tape
Ribbon
Glue Gun
Scissors
Safety/Push Pin

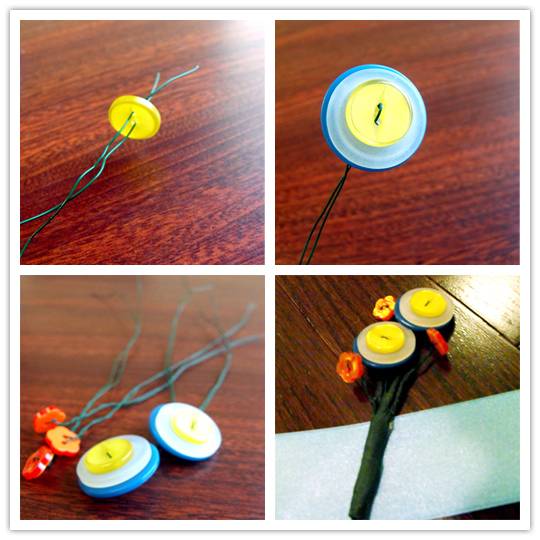
For each flower, cut approx. 16” of floral wire. You can cut this down shorter once you are finished, but it’s easier to initially handle if the wires are longer. Fold your piece of wire in half so it is 8” on each side.
Starting on the top of the button, slide one end of the wire through one button hole and the other end of the wire through the adjacent button hole. For layered flowers, repeat with as many buttons as you like. Remember to start with the button that will be in the front (we started with yellow). Once all buttons are strung, twist the wire behind the last button to keep them secure and wrap each one in floral tape – this helps bulk up the stem and makes it easier to bunch.
Arrange each stem until you have your desired look. Wrap the all of the stems together with floral tape – this will keep your arrangement in place. Trim any excess floral wire from the bottom.
With ribbon, cover the area that you wrapped with floral tape to create a beautiful “stem” for your button-iere and secure with hot glue. Using a safety or push pin, affix if to your groom as you would a real boutonniere.
Images from Purple Martini Wedding and Event Photography and Silverberry Occasions.
What great idea …i like !! very clever .
Great idea, can I ask what size of buttons you used for this? We are going to do this for my groom 🙂