Are you on a very small wedding budget but you really want beautiful lanterns at your wedding? Well here’s your solution: the can lantern. This is really easy to make and the end result is beautiful – your guests will have no idea what these really are. You’ll just need a can and a tea light for each lantern, as well as a little string, some hot glue, and some spray paint. Here’s how to make them:
Making the Lanterns
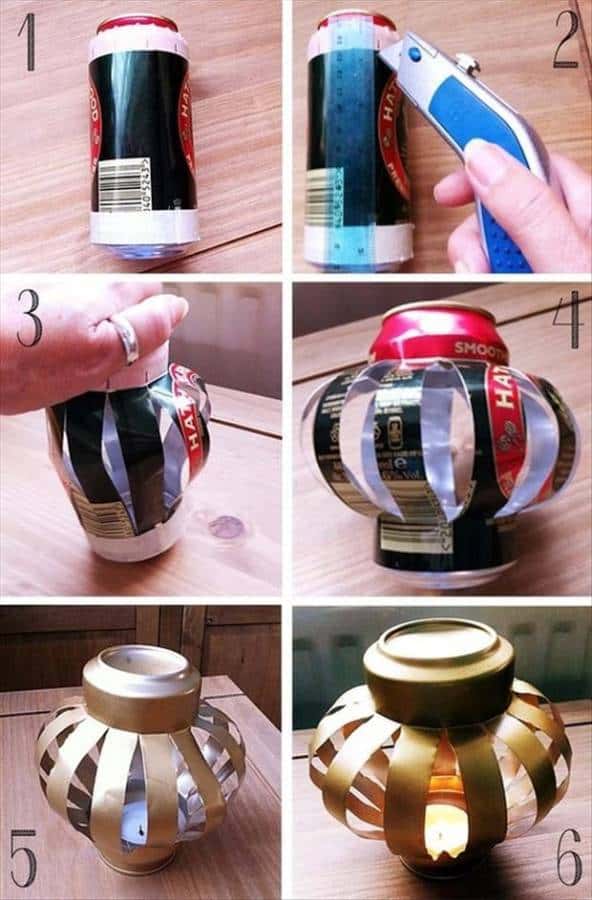
Start with the empty can and a ruler. Place the ruler alongside the can and use a box cutter to cut vertical slices in the can, using the ruler as a guide for how much space should be between the slits. Do this all the way around the can until the entire thing has evenly spaced slits.
Next, apply pressure to the bottom of the can (with the can upside down) until the slits open and the can sections bow out, forming the walls of the lantern. You may need to work with them a little so that they’re all even and bowed out perfectly rather than crumpled.

Once you have the lantern shape made, you’ll want to spray paint the can in whatever colors you’d like. Silver and gold look beautiful and you could even add jewels or glitter. Now, the tea light sits inside the can on the bottom (just slip it through one of the slats). Hot glue string to the top of the lantern and hang. You can then use a long match or lighter to light the tealight.
See how easy this is – and it’s a lot of fun, not to mention, it’s super cheap!
Thank you so much! This is exactly what I needed!!!! Trying to pull off a budget wedding in 3 months!